LoJ: #104 (Pre-LiDAR #100) / 13,812' Dallas Peak
Peak Summary
Dallas Peak is one of a handful of technical 13ers and is now re-rated by our route a low Class 5 climb. Using the "classic" route suggested by G&M and/or Roach, the rating is a low 5th class. Our suggested route is an alternate that can be completed without rope or protection by experienced climbers who are use to fairly extreme exposure. Most others will still prefer a rope but a little extra equipment is needed. Exposure at a few points is substantial and potentially deadly. The final lead is basically horizontal with very little to protect it. The trailhead is accessible by passenger vehicles with better clearance. The peak can be climbed in a longer day. This route description has been revised as of 2021. We offer it as an alternative to the "standard route." This west ridge has less technical work on it but still requires excellent route finding skills, experience and tolerance for extreme exposure. Dallas Peak, by either route, is considered by many to be the most difficult summit of the Top 100.
Dallas Peak West Ridge Route
-
-
Mill Creek TH/Deep Ck Short Cut
For either a driving approach on CO145 from Lizard Head Pass or CO62/CO145 Placerville, follow CO145 1.8 miles west from the CO145 junction (traffic circle) referred to by many as "Society Turn/Junction." You'll be following the segment of CO145 that leads into Telluride. At 1.8 miles, turn north (left) onto FR637, a graded dirt road. Follow that road .75 mile to a switchback with some limited parking. This is the trailhead for Eider Creek. Overnight camping here would only be possible in a vehicle. There's really no room for a tent, but 7 - 8 vehicles can fit here. Continue along the dirt road another 1.0 mile, passing 3 other camp spots on the left (none very large or level and can only fit one vehicle) to the Mill Creek TH which is just before a locked gate and ponds above. There is very limited parking here along the road and one small pullout. The trail is on the north side of the road, about 50 yards back from the gate. This trail is considered a "short-cut" to the Deep Creek Trail and will also intersect the "Sneffels Highline Trail." There is no toilet available here and no privacy. Make plans accordingly. A wag bag would be good to have.
Camping
The land around the trailhead is largely private property. We do not recommend attempting to camp there. There are no facilities. There is no camping available in this immediate area unless you pack in for a ways. Some people manage to find room to set up a tent along the side of the road at or near the trailhead. Most just vehicle camp. This can be a very busy trailhead on Friday nights. At-large camping anywhere near Telluride is difficult to come by and generally not allowed. The nearest campground is located along HWY145 about 5 miles south from "Society Junction." That's the "Sunshine" Campground and it is Forest Service maintained with fee. You may be able to find some at-large spots on 63J south of Illium or back along HWY145 before climbing the big hill into the Telluride Valley. There are several at-large spots along the highway, but be careful of private property. There is also a campground located on the east end of the town at the town park. Campsites are available on a first-come-first-served basis. These links offer more information:
Click thumbnail to view full-size photo + captionRoute Description
Year Climbed: 1992, 2021Note: Our first ascent of Dallas was in 1992 and we were accompanied by our regular partner Fred A. In 2021, Tim Cooney re-visited this summit with son, Shaun Cooney. The following route description represents a partial revision of our 1992 report.
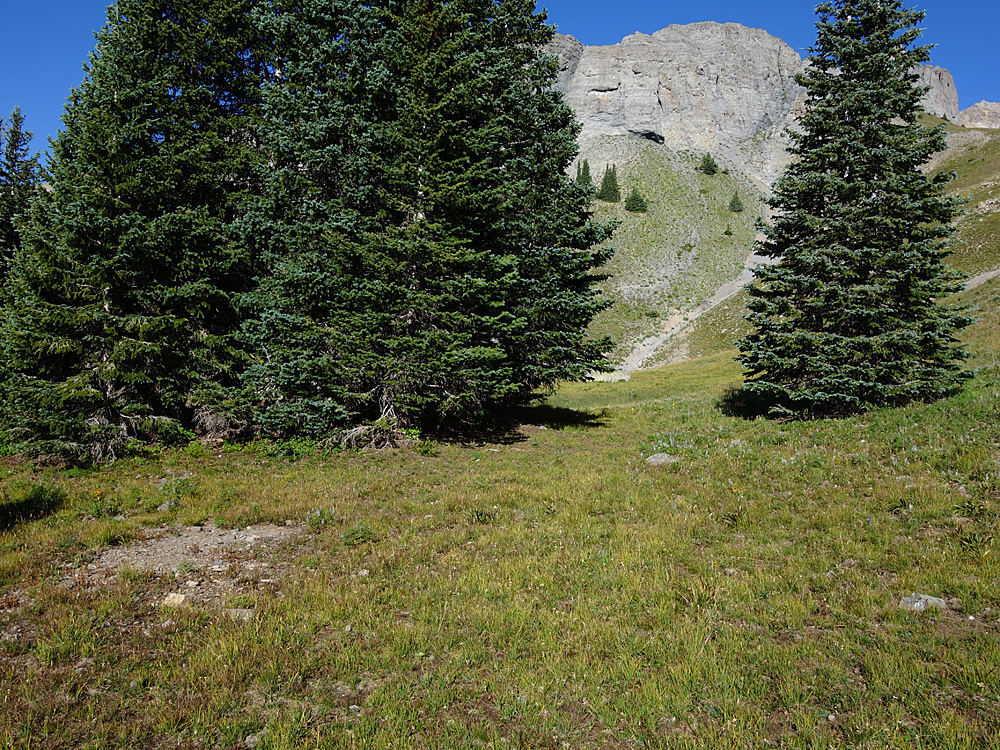
From the Mill Creek/Deep Creek Short Cut trailhead, hike north on trail 418.1A for .6 mile. The trail will intersect with Trail 418 coming in from upstream. N 37° 57' 43.0" W 107° 49' 31.5". Turn left and continue west on switchbacks, then north, then west again to a ridge where you'll intersect the Sneffels Highline Trail #434 in 1.25 mile. N 37° 57' 54.4" W 107° 50' 05.7". Head north following the dense, aspen-forested ridge upward. After a tedious section of switchbacks, the trail will eventually head more NE into a basin at the foot of Dallas Peak, almost due south of the summit. This large basin trends NW toward a saddle between T.0 and West Dallas (PT 13,741). The upper portion of this basin is a huge rock glacier. At about 11,400 feet, there are some camping possibilities used by some climbers, just after crossing the stream. The campsite is on the south side of the trail and less than 50 yards off in some trees. It's large enough for a couple 2-man tents with a fire ring. There is usually a sizable stream flowing down from this basin for water supply if needed. It's about 1.5 mile from the previous trail intersection. Coordinates are: N 37° 58' 39.7" W 107° 49' 46.5".
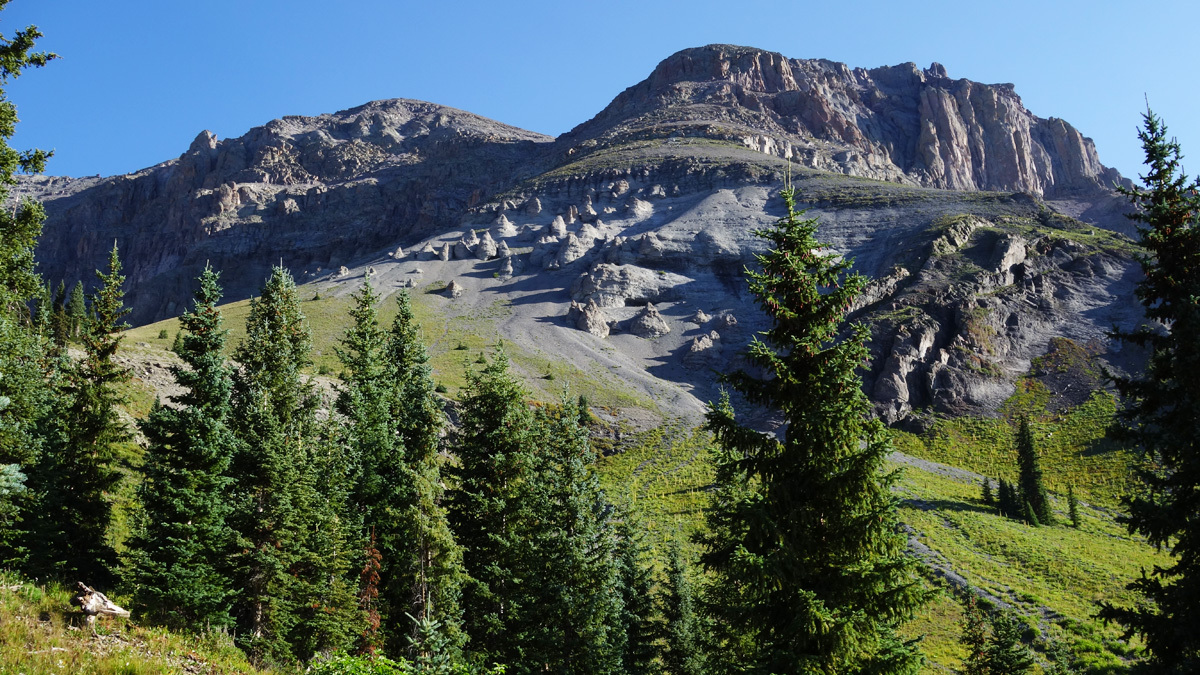
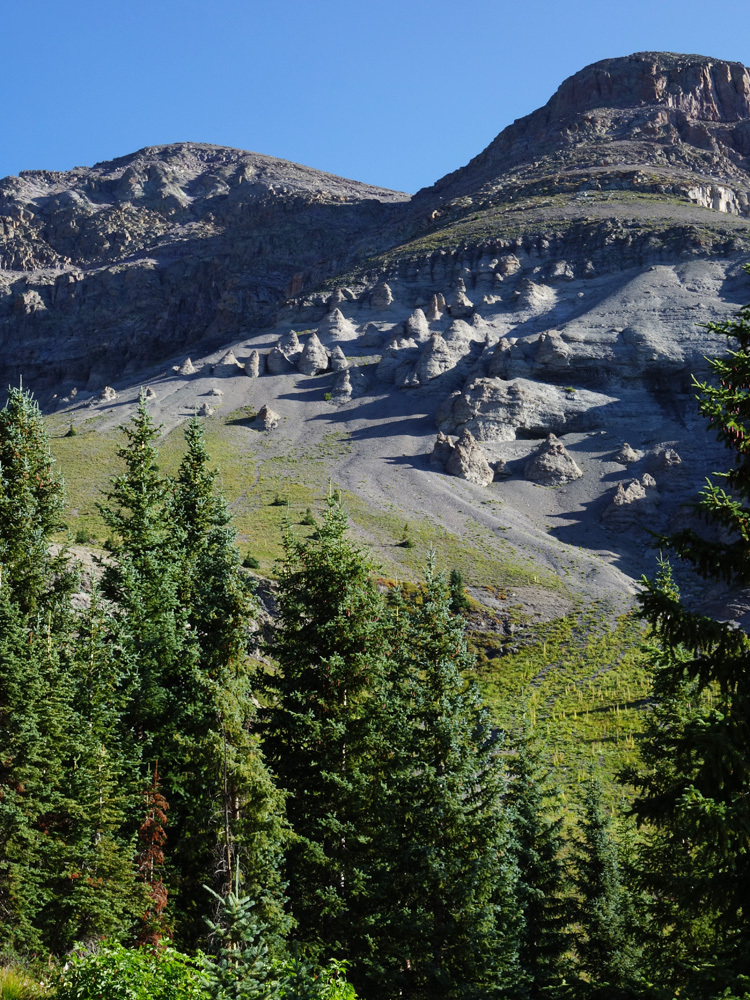
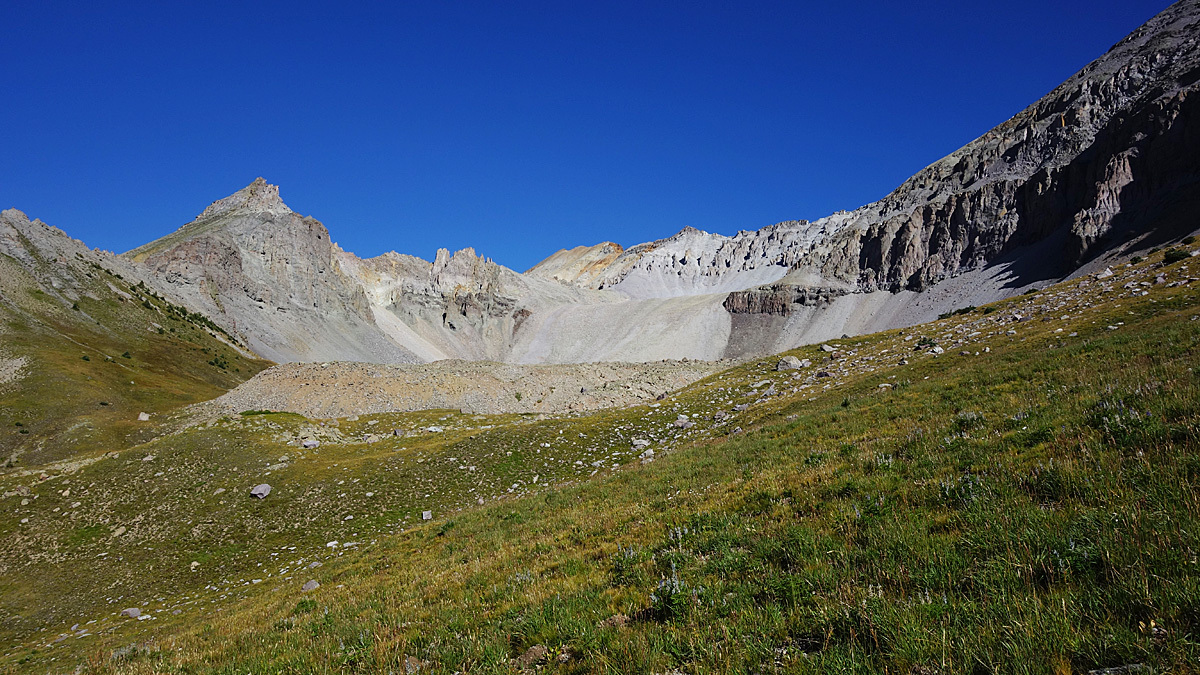
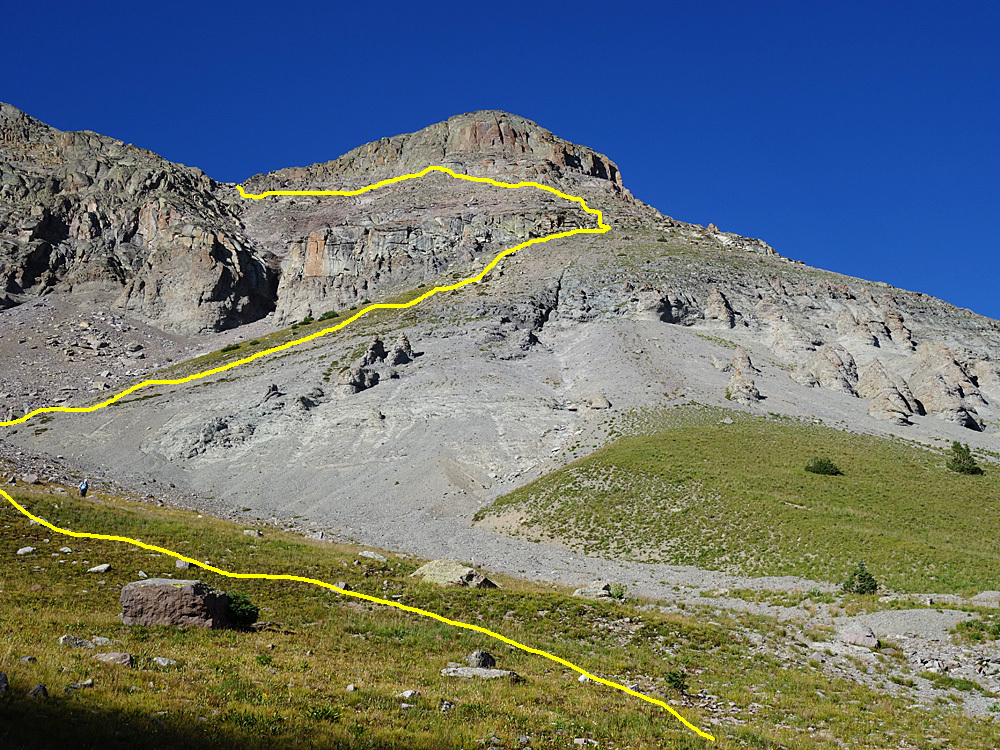
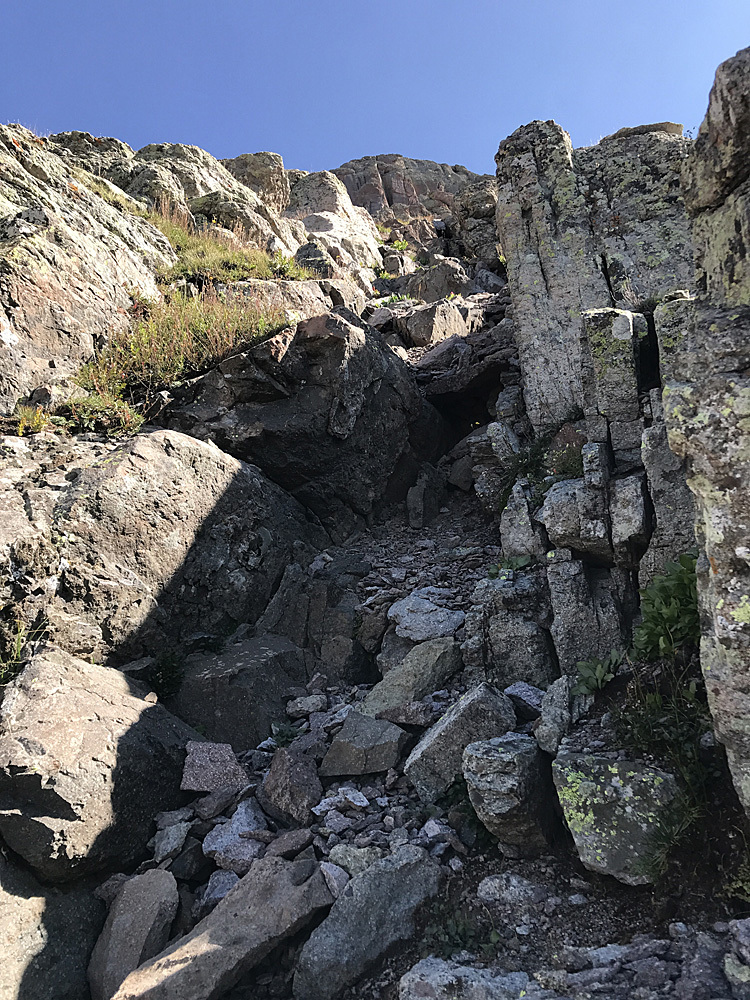
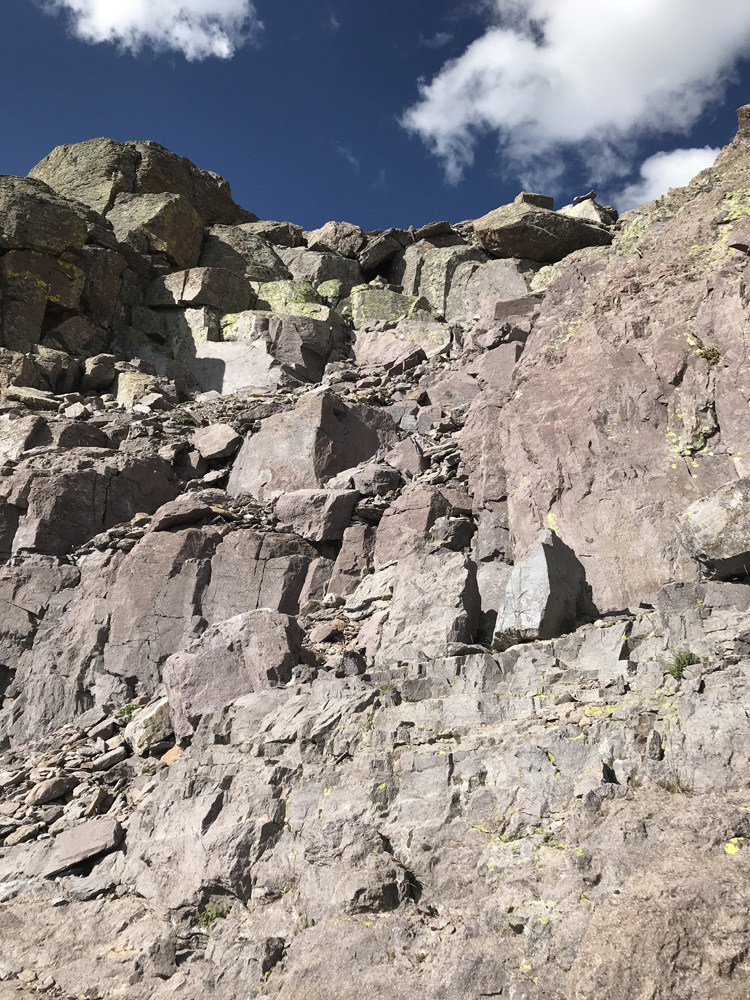
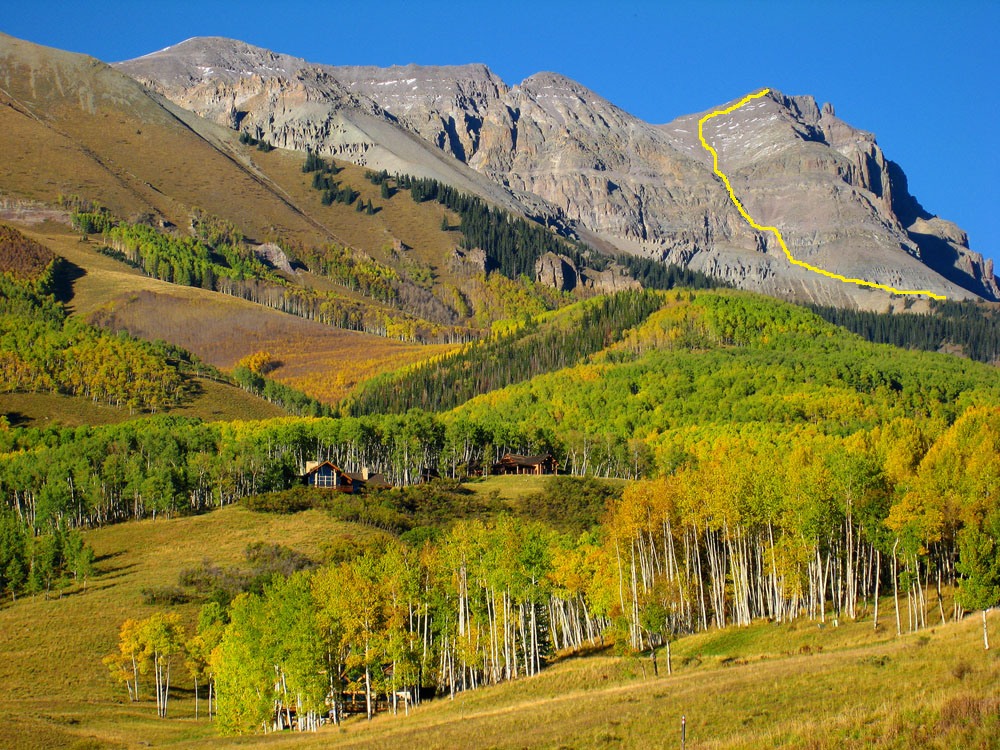
The so-called "standard" route on Dallas would have you continue on Trail #434 eastward to climb Dallas by way of the SE slopes. Our route breaks off in the vicinity of the stream crossing and possible camp area. As you look toward Dallas from this stream crossing location, you will see the SSW ridge of the peak with cliffs extending NW (left) to a very pronounced couloir. West Dallas is farther left of that couloir. Below the couloir and on the right side will be tundra slopes that will lead upward., that also have "beehive" rock formations scattered around. Two tundra slopes, with a shallow gully in between head upwards and appear to eventually converge below some prominent cliffs. Don't head immediately for them, though tempting. Head up the basin, staying east of the main stream, hiking steeply through open areas and trees. Continue NW up this way to the last trees where there is a bench level and a possible place to camp. Elevation here is 11,765 ft. Continue north on grassy slopes , then begin working your way more to the right to continue upwards and aim to be on the left (north) side of the runout from the main, great couloir. Continue up past the end of the tundra to a large boulder nestled within the shallow couloir at this point and cross over the couloir at 12,240 feet to gain another sparsely covered tundra slope with a few scattered, low evergreens. As you walk up this tundra slope, it becomes steeper and the tundra thins out making footing more difficult on loose, rocky soil and talus. Above the tundra slope there will be a section of broken cliffs and ledges where route finding becomes more difficult. You may find some cairns (we left a few at critical cliff junctures). Generally, you will first continue to head on an upward, diagonal trajectory toward the SW ridge, but never going that far, finding passage through one cliff band as soon as you can (we found a break of about 12 feet of more vertical, 3rd class scrambling), followed by a turn more back toward the left away from the SW ridge. That will be followed by a second, more formidable cliff band to find passage through heading back towards the great couloir. This second band was still only about 15 feet of 3rd class work. The goal now is to get as high as 13,100 feet, at the base of the highest cliffs, then traverse across very unstable talus to the couloir. A loosely-called shelf allows passage along the base of the cliffs, contouring NW toward the couloir that drains the more gentle slopes above on the SW flank of Dallas. Once you enter the couloir, scramble upward about 50 - 75 feet through large blocks (3rd class, protection not needed) to gain the huge, open talus-filled bowl. In earlier season, expect patches of snow here. At 13,150 ft., you should be out of the more difficult and vertical portion of the couloir.
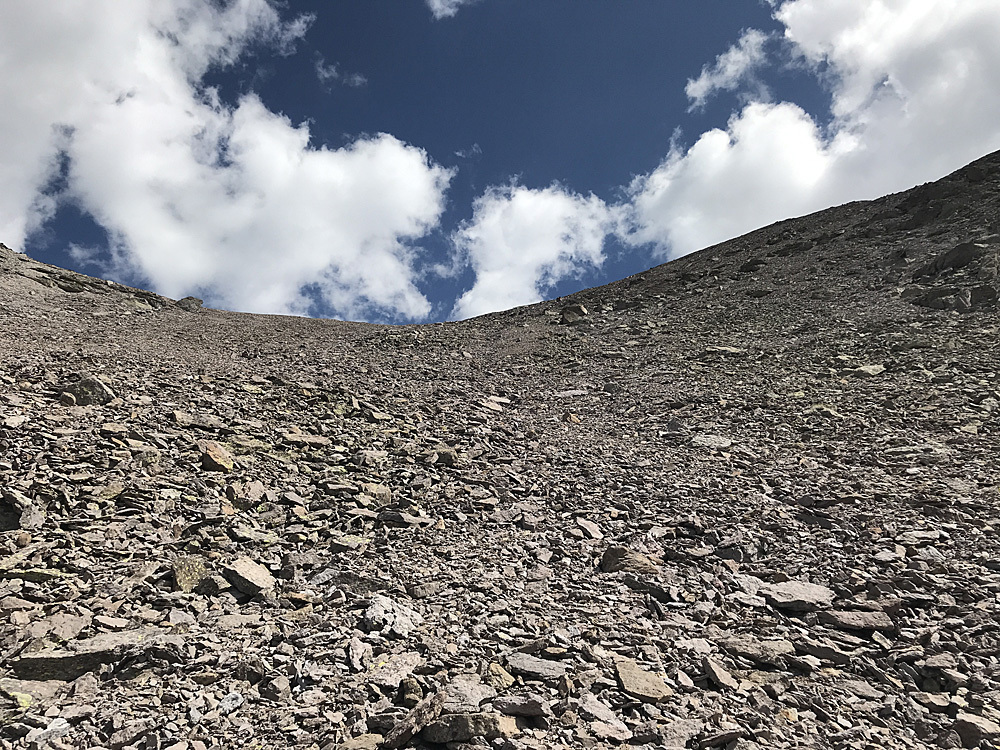
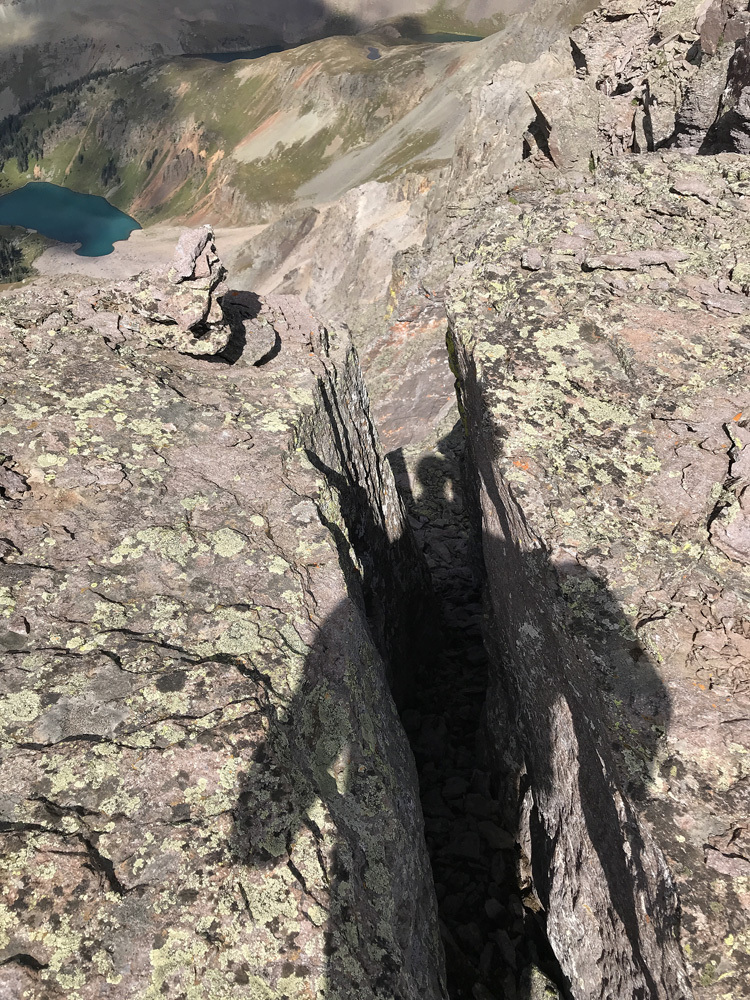
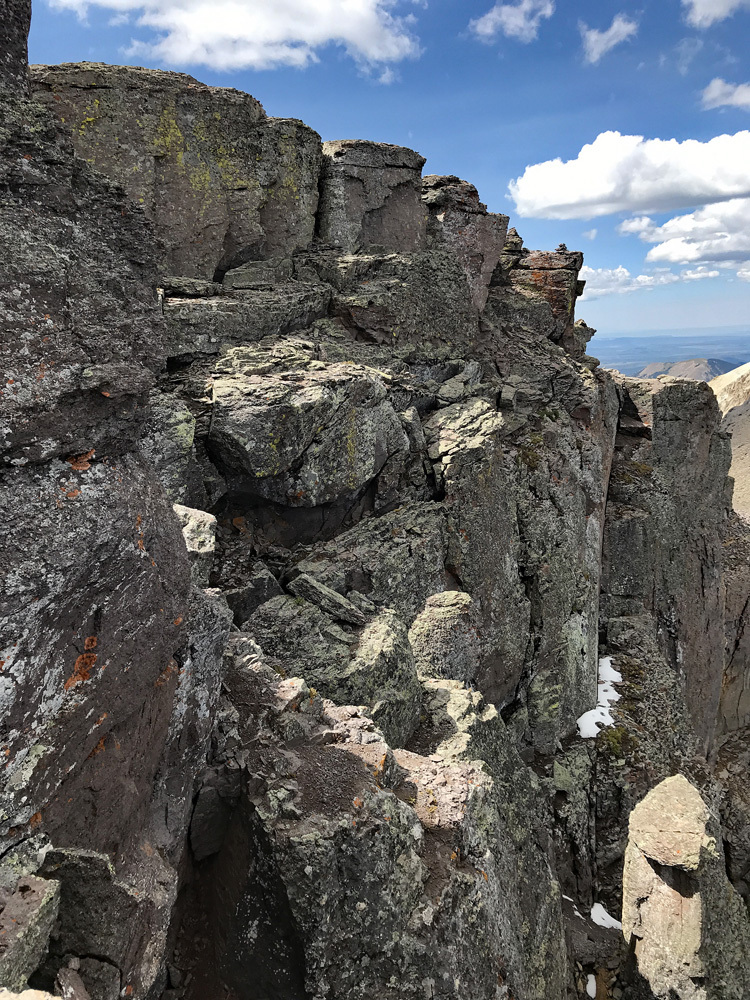
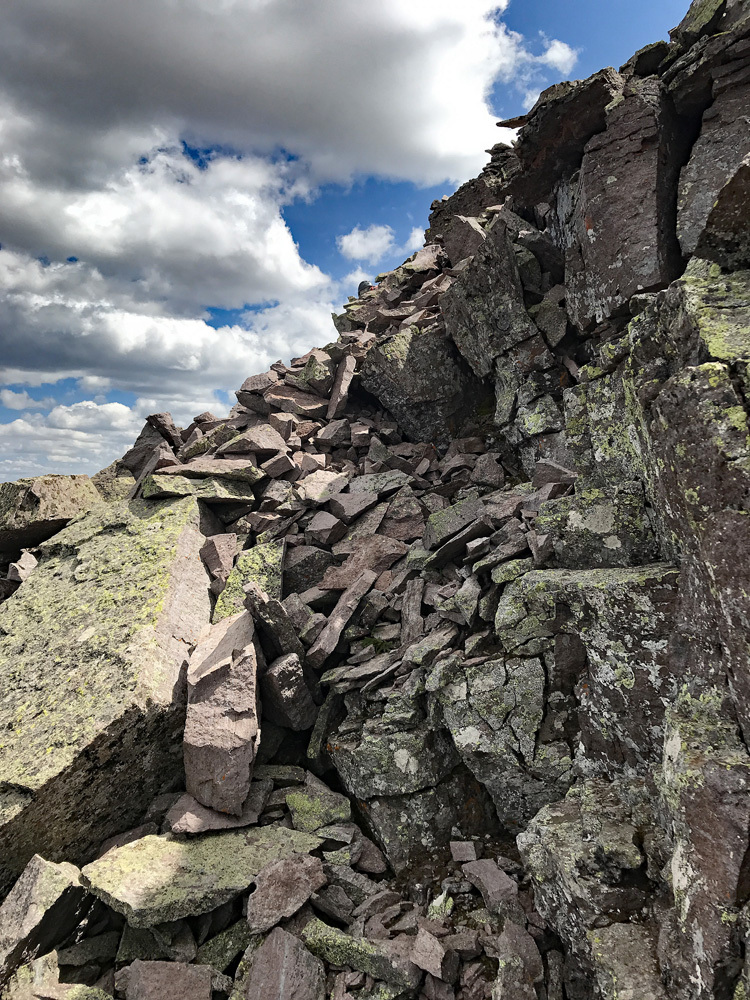
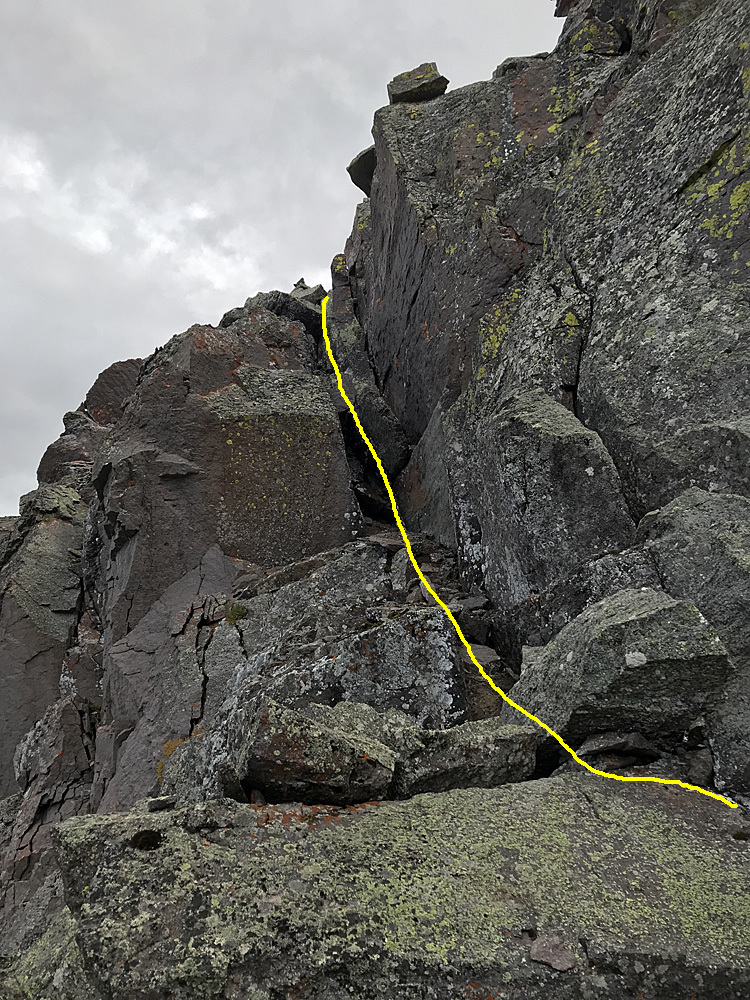
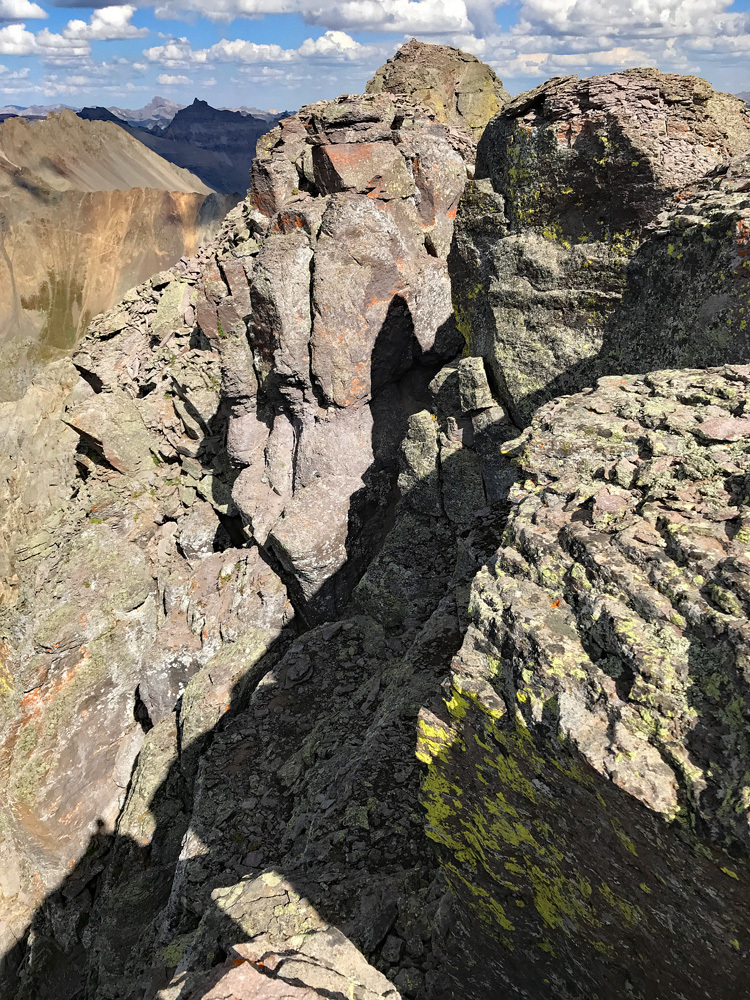
From the bowl, it's a trudge up assorted talus to ascend another 600 feet to the Dallas - West Dallas saddle and the west ridge of Dallas. Once on the ridge, follow it eastward until it suddenly narrows to a series of broken blocks. The technical part of this climb now begins. You will be standing on a large, flat block. The summit of Dallas is only about 20 feet in elevation above, but about 200 feet or more horizontally east. The ridge here is broken into four prominent, rock towers (for lack of a better term) with significant gashes in between each. The first three are relatively flat on top. You will be standing atop the first. The fourth is comprised of a couple of very large boulders with a "crows nest" perch in between that makes a secure belay point. A large gash between the first and second towers will deter further progress east unless you want to make a daring leap. Coordinates here are: N 37° 59' 17.6" W 107° 49' 29.7". To avoid the first gash and second tower, follow these directions:
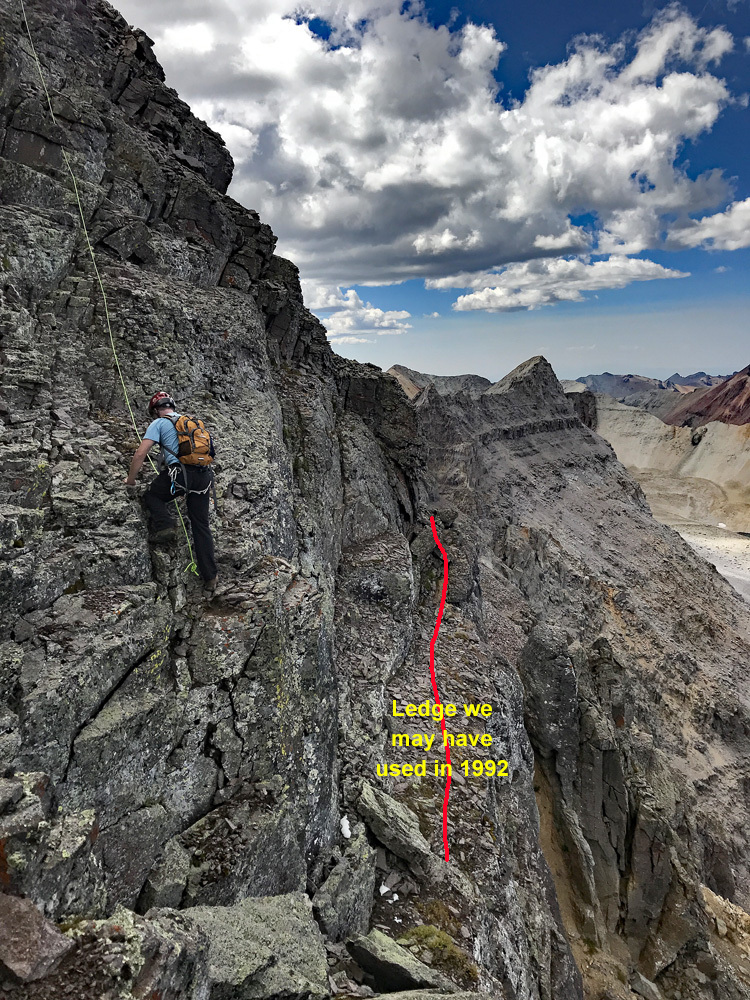
Just before the ridge narrows here at the gash, look for a narrow cleft in the rock, just large enough for a body to get through, that will drop down onto the north face of the peak. Downclimb the crack about 6 - 8 feet to a ledge, then about 20 more vertical feet diagonally along ledges, passing the head of a minor couloir. There may be some snow here. The exposure here is very intimidating, but footing is generally secure, though care must be taken because of the gravel, rocks & sand on the ledges. Contour east a little, then follow a natural up-climb diagonally to ascend to the top of the third tower. The top is flat again and has plenty of room. (In 1992, when we first descended, we went down a good 50 feet, traversed horizontally on ledges at least 50 feet and then scrambled back up to the ridge to the fourth tower. In 2021, we were unable to duplicate this maneuver because of the dangerous loose rock conditions on the lower ledges.) From the top of this third tower, we set up a 50 foot rope to rappel from. For an anchor, we used a 20 foot sling tied around a large flat boulder on the the top of the tower. Using 20 feet allowed us to extend the anchor so that you could get into the rappel by standing on a ledge below the level of the sling and anchor. We then made a somewhat diagonal rappel 50 feet down to a prominent ledge and left the rope in place. It would be safest to have at least a 60 foot rope here. From the ledge, we crossed eastward at the head of another couloir and climbed up a little to the bottom of a slanted crack that headed back up to the main ridge. This narrow crack had a large stone wedged near the bottom that required what we estimated to be a 5.4 move to get over and above. No rope was used here because you are securely wedged into the crack. The top of this cleft led to the last (4th) tower and something of a "crows nest," a small, stable perch area between two large rocks. We set up an anchor here for the final 100 foot lead to the summit, which is nearly horizontal. Once again, we used a 20 foot sling around the large rock on the left if facing toward the summit. You could also sling a more pointed boulder on the right and use less sling. This is a secure place to begin the final lead from. The lead climber will need to get onto the ridge crest and follow the large, narrow blocks east. One block will require something of a straddle move. After that is a short wall of about 7 feet with good holds to climb up. (Low 5th class) The exposure of the ridge line remains severe here. After acquiring the top of this "wall," there will be another large rock to either traverse around on the north side or simply go over the top. This is the last obstacle. From here, it's a simple stroll to the summit. 100 feet of rope will get you past the last big rock. Anchor your rope around a boulder to use for belay on the return. All of this final ridge section is on reasonably secure rock. The "climbing" moves are either low 5th class, or some may consider it as only 4th class but the exposure tends to be nerve wracking, making them seem more difficult. Since this last lead is entirely horizontal, unless you place protection every 10 - 20 feet, a person would pendulum if they fell and there is precious little opportunity to place any. To be honest, we did not.
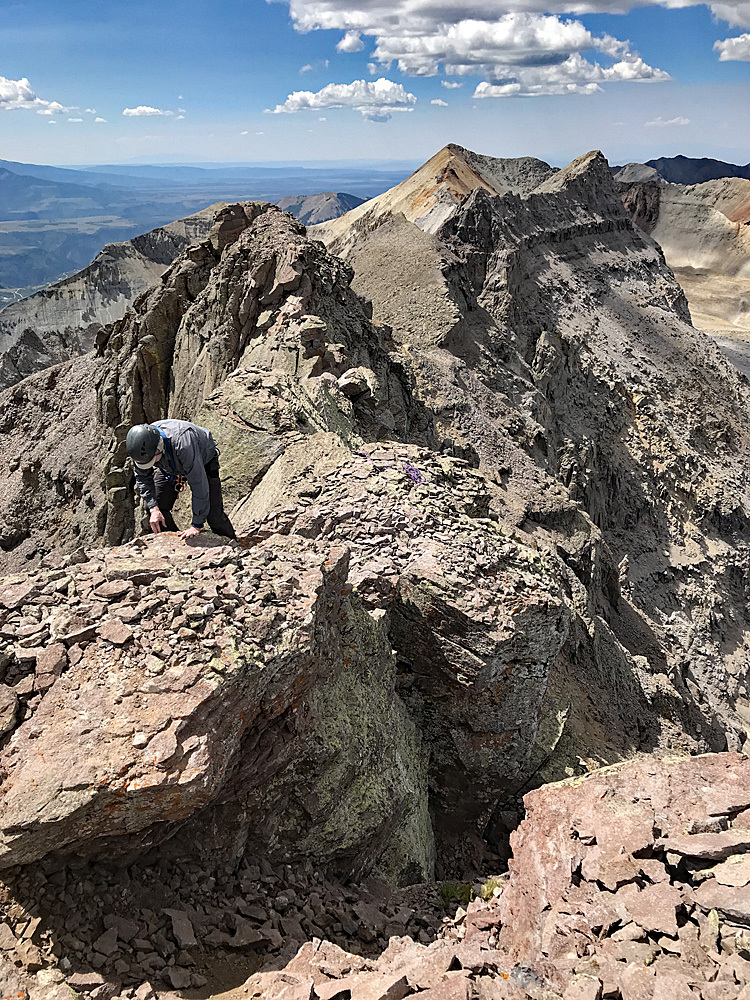
Once on the small summit, congratulate yourself for completing one of the most difficult 13ers, then take a rocky seat to enjoy the stupendous view. From the summit, you can gaze down into the Blue Lakes Basin, the upper Mill Creek basin and Mt. Sneffels looming above all of this fractured and spectacular range. For the descent, return as you came, with care. One person can provide a body-anchored belay (or you can attempt to find a solid anchor point) while another clips into the rope and works back across to the crows nest. If your team is more than two people, each party member may do the same until the last member. That last person can be belayed by someone from the crows nest/anchor station. Downclimb the narrow slot, (going back over and down the wedged boulder is easier than going up) and work horizontally across to the other rope you left behind anchored at the third tower. First person up will have to provide something of a self-belay by tying onto the rope with their rappel device. Then that same person can belay any others back up. From the third tower, return to the first as you came. Remember, most accidents occur on the way down. (As an additional note, it may be possible to stay on the crest of the west ridge and avoid the traverse out onto the north face, but two reports we have found indicate this to be fifth class climbing at a higher level.) The remainder of the route down should follow your ascent route and the trails used earlier. You may want to place cairns to help you find your way back to the main couloir, base of the highest cliffs and key breaks in the lower cliffs.
For minimal equipment for two people we suggest the following: A 60 foot section of rope; a 100 foot length of rope (or 120 may be better); two- 20 foot lengths of tubular webbing for anchoring slings; 8-10 locking biners; 2 rappel devices; harnesses; helmets; a couple other mixed lengths of sling for protecting the final lead and perhaps a medium cam.
Additional BETA
Links to other information, routes & trip reports for this peak that may be helpful. -